Technology
Thin wall cutting (lathe) processing

Thin wall cutting (lathe) processing means cut the materials as thin as possible but still keep the high precision. Usually, light weight parts for cars and high precise parts for industrial maintenance demand this thin wall cutting (lathe) processing, but it is not easy to produce.
When you cut the plate thickness or wall thickness for less than 5mm, this plate thickness or wall thickness will be very weak in strengths. Therefore, this material will be disfigured because of its internal stress. Also, we create the products with the process of press and wring to make it thinner, these processes unavoidably make these products unfigured in the dimensional accuracy for 100 to 300 microns (0.1mm to 0.3mm).
On the other hand, we use cutting for process to make precise parts, regular keeping method affects the external stress directly for the product. Therefore, the enormous number of slippage will happen. This is why it is difficult to keep the high precision which is less than 5mm for regular structure.

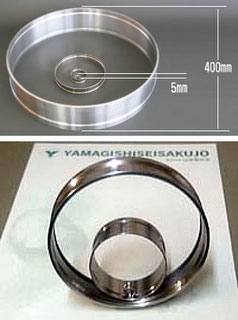
Machined from a pipe or a round bar to a ring of 0.5mm thinness
Finished to 20 micron or lower deviation from roundness
Size: From φ5mm to φ800mm

Challenge to flatness and micron precision in parallelism of thin-walled products
We pursue flatness and parallelism in width which difficult to secure size precision
You can rely on Yamagishi company-ss!!
When we use our company’s thin wall (lathe) cutting process, we can guarantee the dimensional accuracy for less than 20 microns (0.02mm) even it is less than 5mm plate thickness or wall thickness product. Therefore, you can keep the product weight lightened but it is still high precise.
Usually, it is possible for other makers to process less than 3mm plate thickness product using special clamp (holding tool), but it takes a lot of cost and time to manufacture. Our company has an original constructing method for pasting and which makes it possible for us to process micron order without using any expensive jigs.
In addition to this, in the case of processing less than 3mm thin wall product, they usually use particular chuck (e.g. collet chuck) but our company use ordinary three- jaw chuck. Herewith, it is possible for us to cut the cost (because we don’t use expensive particular chuck) and to require shorter production period.
About chucking
In the case of round bar
Even we use three-claw chuck to grip it, the material chip or the material itself give off the heat. Also, the hardness of the material itself is very high, it is possible to cut (lathe) for processing easily without becoming misshapen.
In the case of pipe material
A pipe material which has less than 5mm thickness cause misshapen because it is affected by heat conduction directly. Therefore, we use the circular chuck which has more contact surface to moderate the misshapen due to release the heat or to remove cutting condition.
In the case of sheet material
Usually, when you process the sheet material, you use the jig. However, in that case, only the holding part are touched so it is difficult to release the heat and as a result, it causes the misshapen. Yamagishi company-ss has original construction method for pasting and which makes it possible to contact full scale to release the heat. Therefore, it is possible for us to give you a micron order measurement without misshapen.
Composite lathe processing

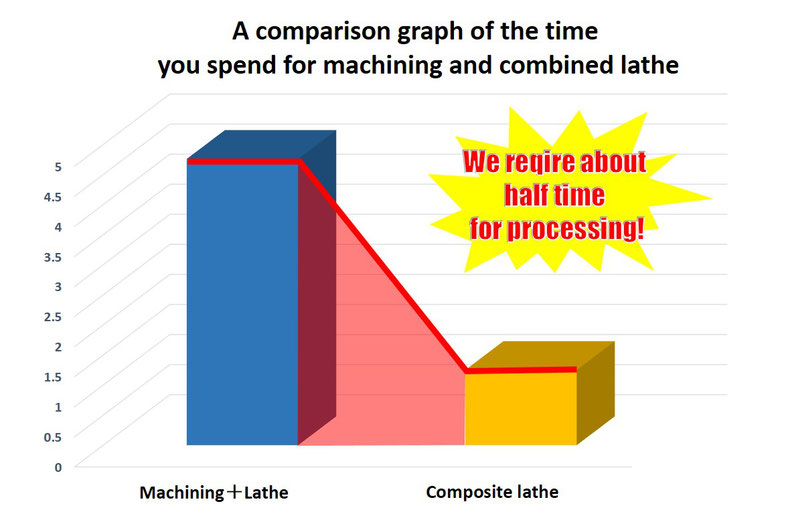
| Process | Machining + Lathe | Composite lathe |
| M1/LS | 10 minutes | 3 minutes |
| M2/L2 | 230 minutes | 20 minutes |
| L2 | 46 minutes | 52 minutes |
| Total | 4 hours 46 minutes | 1 hours 15 minutes |
The advantage of combined lathe processing
When you process an aluminum wheel, combined lathe takes half time of machining. The biggest difference of machining center and combined lathe is that when you use machining center, you have to excavate step by step to match the window processing for completing.
On the other hand, when we use a combined lathe, we finish the lathe processing for the most part, then we process the pocket part and leaving the window processing part. In this time, we do not excavate to process the pocket but we remove the hole with contour machining. We do only one lathe finishing processing at last. This is why we require half time than machining center.
Hardness of combined lathe processing
When we process thin wall cutting with combined lathe, we place importance on chucking (holding) skill. For example, in the case of aluminum, it is very hard to complete the product in the range of demanded dimensional accuracy because it is a thin wall product so there is small area of chucking. It means that if we grip it hard, the part will be misshapen and if we grip it softly, the part will come off from the chuck. Especially, if the demanded dimensional accuracy is less than 0.03mm, it becomes much harder. If the product has about 4mm width, Yamagishi Company-ss require only 1mm depth of chucking and hold φ200mm for lathe processing. Our chucking is able to hold without a big influence of external stress and to produce a chucking within a little holding area. This is why we can give you a discount because we do not use any expensive jigs to process the precise thin wall cutting.
Our special skill is dealing with deformation of chucking pressure [Paste method]

When we are not able to get rid of deformation of chucking pressure, especially in the case of the disk which plate thickness is less than 3mm and has a big surface area, we do a chucking with our independently developed skill called [paste method]. This method can produce the product less than 0.03mm of flatness (the greatest accuracy is less than 0.007mm).
This method uses paste with the aid of buffer material between a jig and a material to keep the internal stress (which means the work keeps the normal posture) when we cut the work. It means that the work does not cause the misshapen when we take it off from the jig. When we apply this method to the material which is very deformed and has no part for chucking, we are able to process it precisely without using an expensive jig. This is why we can give you a discount.
Yamagishi company-ss suggest you the best cooperation process.

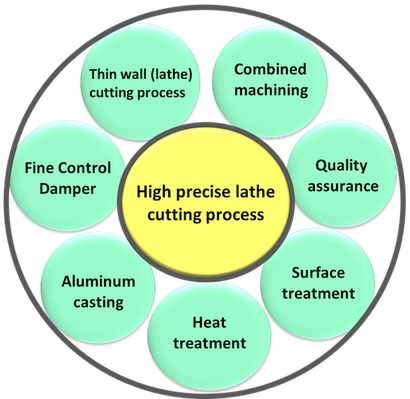
Thin wall (lathe) cutting process
When we use our company’s thin wall (lathe) cutting process, we can guarantee the dimensional accuracy for less than 20 microns (0.02mm) even it is less than 5mm plate thickness or wall thickness product. Therefore, you can keep the product weight lightened but it is still high precise.
Combined machining
We can reduce the cost due to integrate a plurality of steps, high precision by fixing to actual parts, drilling skills for not to misshapen the thin wall and we can offer you a reasonable price because you can choose machines.
FCD
Mainly we use FC150~FC250 FCD370~600.
Our quality inspection system is that enforcing a tensile testing and hardness test. As a product inspection, we enforce the color check and ultrasonic examination. For many amount of small castings, we use Match plate molding machine for inspection.
Aluminum casting
We are very good at cast-in casting such as large-scale casting, stainless steel pipe, aluminum pipe and thin walled product which is very difficult for casting using a sand mold.
We can manage from small lot to mass production. Mainly, we are handling AC4C-T6, CAC702, CAC406 and bronze.
For quality inspection system, we use emission analysis device to inspect the test piece to guarantee that the material ingredients are within a limit of Japanese Industrial Standard (JIS).
Also, we have an organic self-hardening sand reproduction processing machine so we can reuse the products.
Quality assurance
Our specialized staff whose motto is providing a consistent quality are coping with quality assurance under the appropriate environmental condition.
Heat treatment
We are available in vacuum heat-treatment (quenching, annealing and magnetic annealing), high-frequency hardening, cementation nitride processing, quenching, tempering, solution treatment and so on.

